
Upload a 3D model file to a space
Upload, manage, and switch between 3D model files in a space using the Files panel in the 3D Canvas.
Before you start
You need Can Edit access to upload or delete files. See Understand permission levels.
Upload a file
- Open a space and click the 3D Canvas tab.
- Click Files in the left sidebar to open the Files panel.
- Click the upload zone or drag and drop a file onto it.
CADchat converts the file for web viewing. Processing time depends on file size, refresh the page if it takes more than a few minutes.
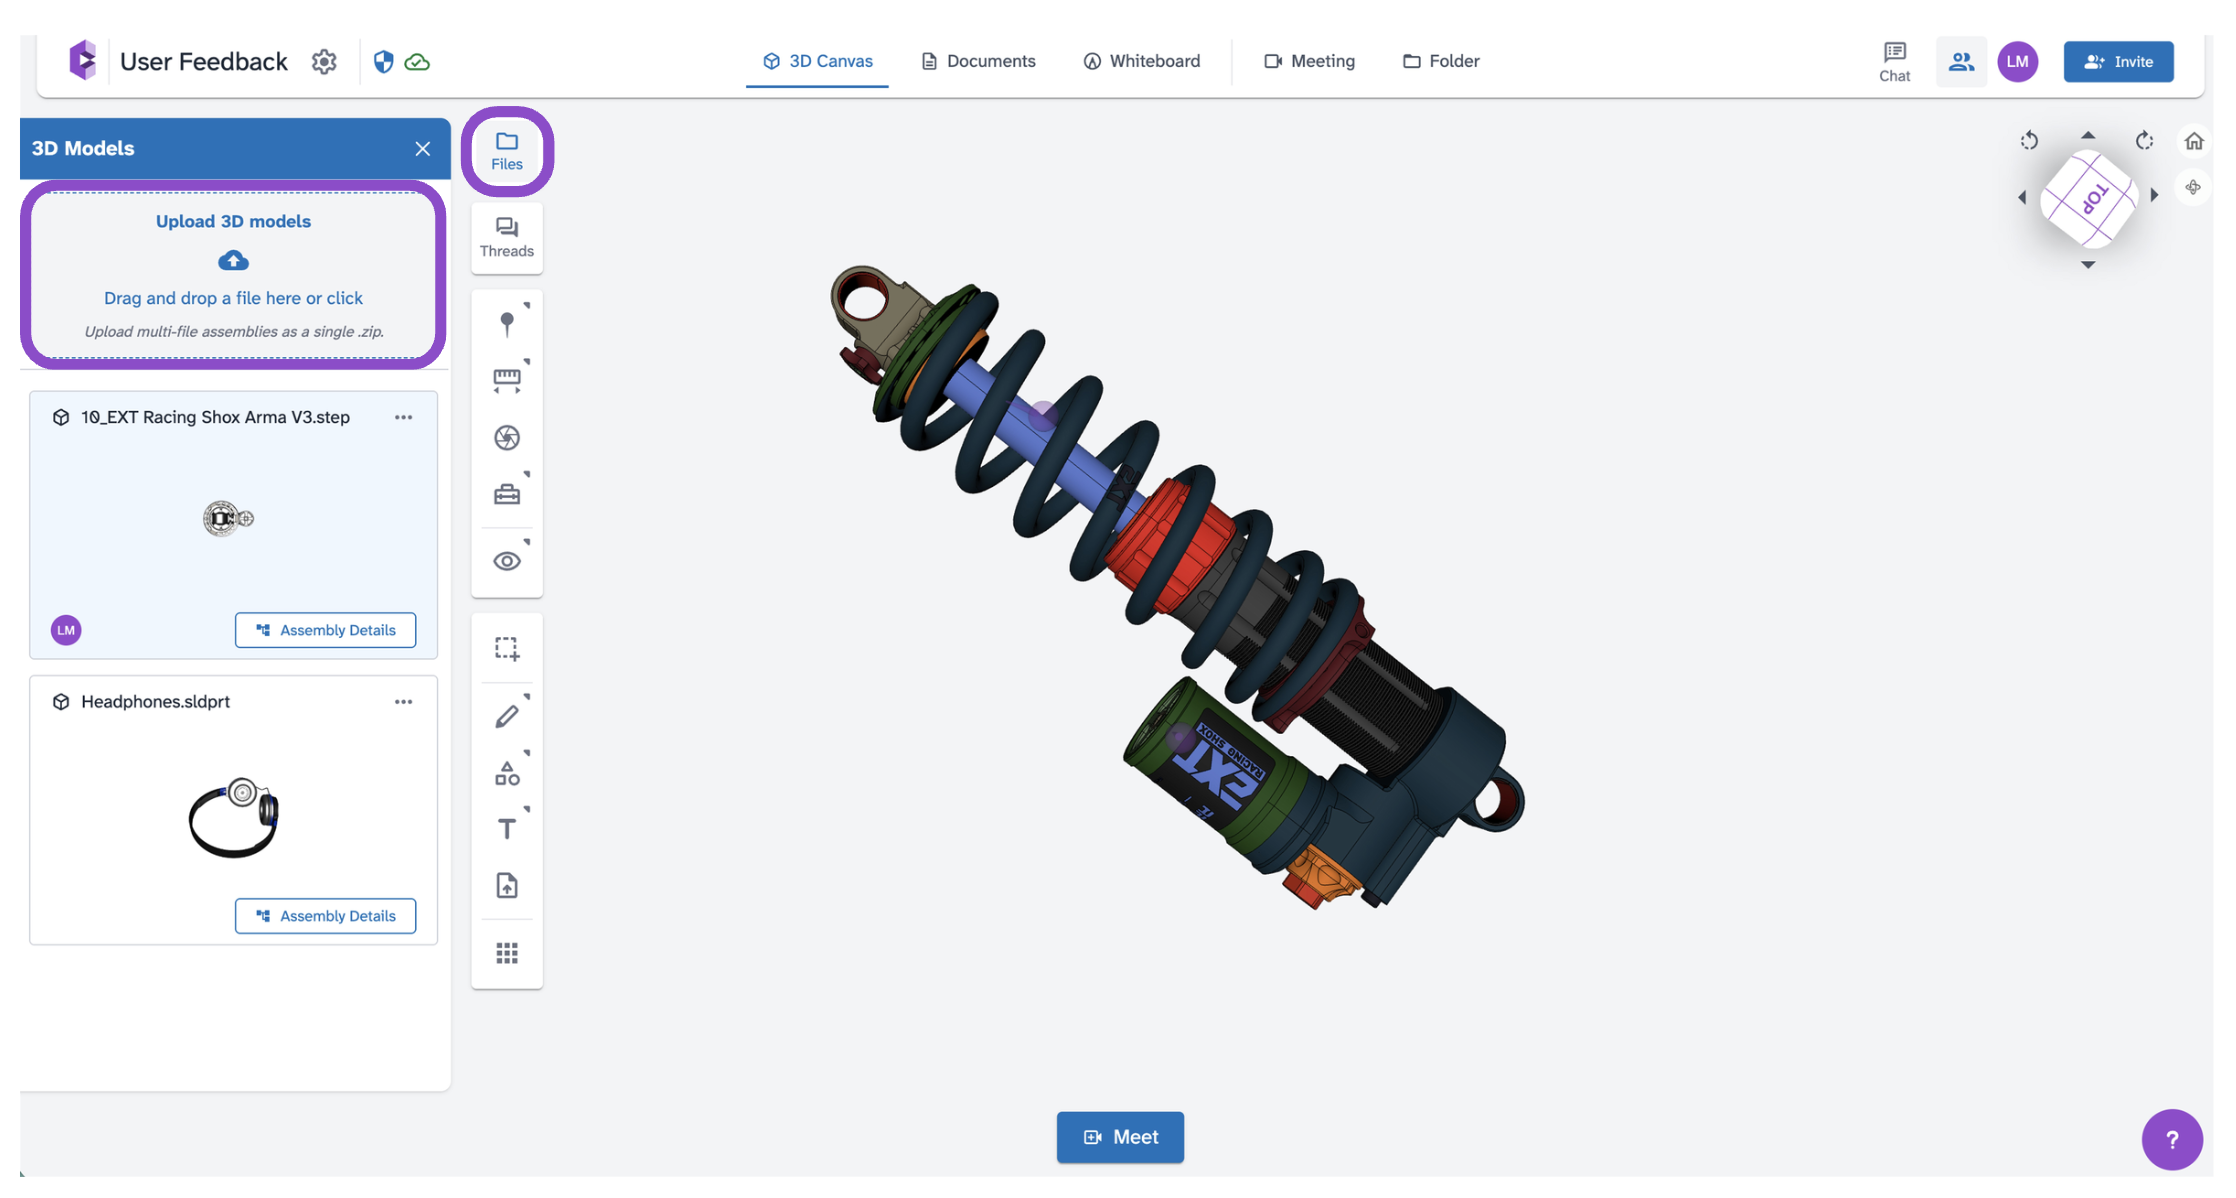
Supported formats: .FBX, .GLTF, .STL, .GLB, .OBJ, .STP, .STEP, .3DS, .SLDPRT, .CATPART, .SLDASM, .PRT, .ZIP, .PAR, .IGES, .IGS, .RVT, .IPT, .IAM, .JT, .F3D, .3DM, .SKP, .IFC, .X_T, .X_B, .SAT, .DWF, .DWFX
Manage an existing file
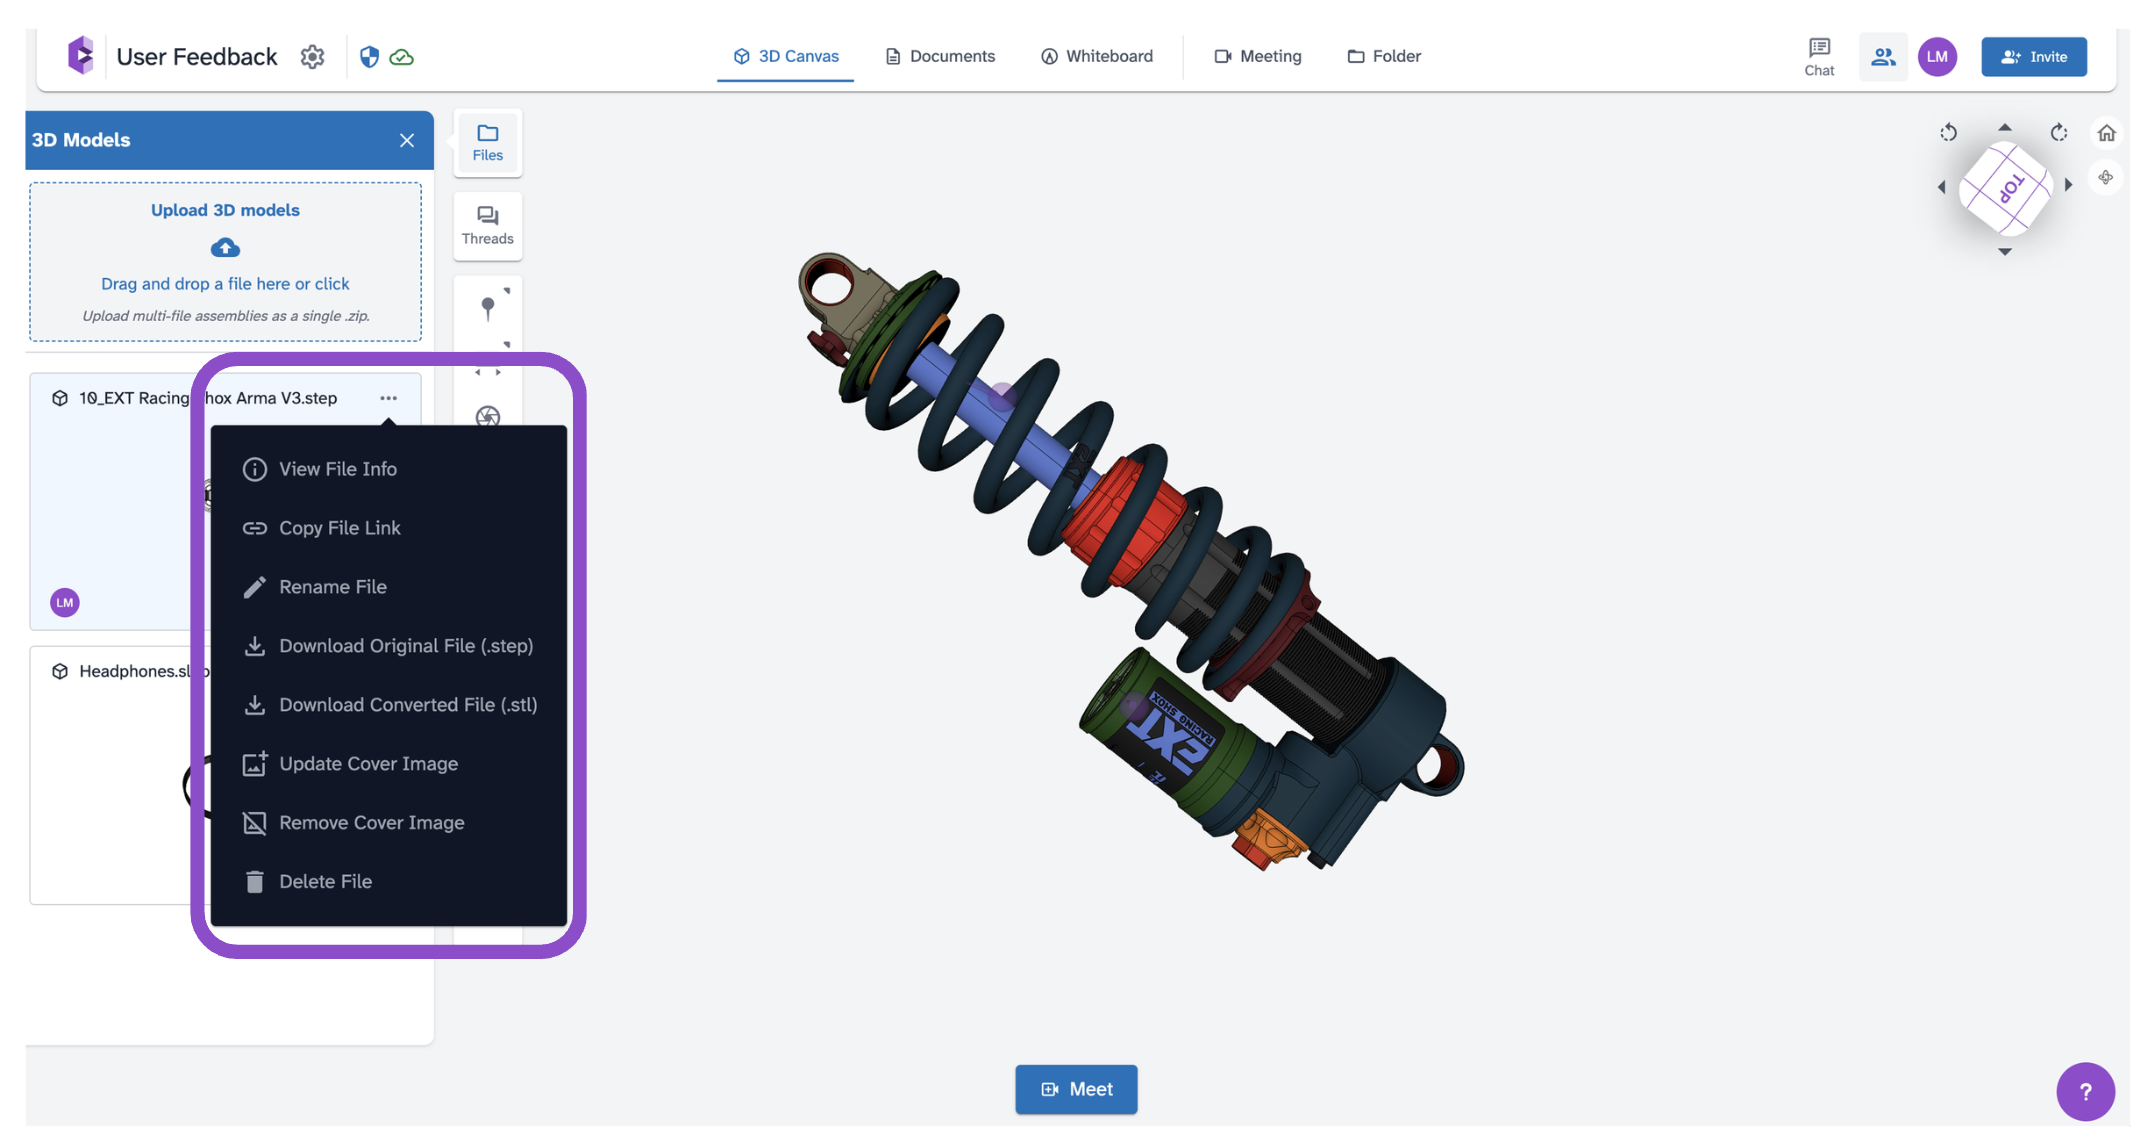
Hover over a file in the Files panel and click the "..." icon to open its options:
- View File Info: see metadata for the file.
- Rename File: change the display name.
- Download Original File: download in the original uploaded format (e.g., .stp).
- Download Converted File: download the web-optimized version.
- Update Cover Image: set a custom thumbnail.
- Remove Cover Image: revert to the default thumbnail.
- Delete File: permanently remove the file from the space.
Tips and edge cases
- Multiple files can exist in the same space. Each appears as a separate entry in the Files panel.
- Files are not shared between spaces, each space has its own file list.
- Assembly files show an Assembly Details button in the Files panel for exploring the component hierarchy. See View assembly details.
- If a file upload fails, check that the format is supported and the file is not corrupted.