
Use the 3D canvas context menu
Right-click the 3D Canvas background to access personal view controls and shared group view settings.
Open the Context Menu
In the 3D Canvas, right-click on the empty background (not on a model part) to open the context menu. Options are split into two categories: My View (personal) and Group View (shared).
This menu controls view and rendering settings for the entire canvas. To access options for a specific model part, such as hiding, isolating, or changing part color, right-click directly on the part instead. See Interact with 3D model parts.
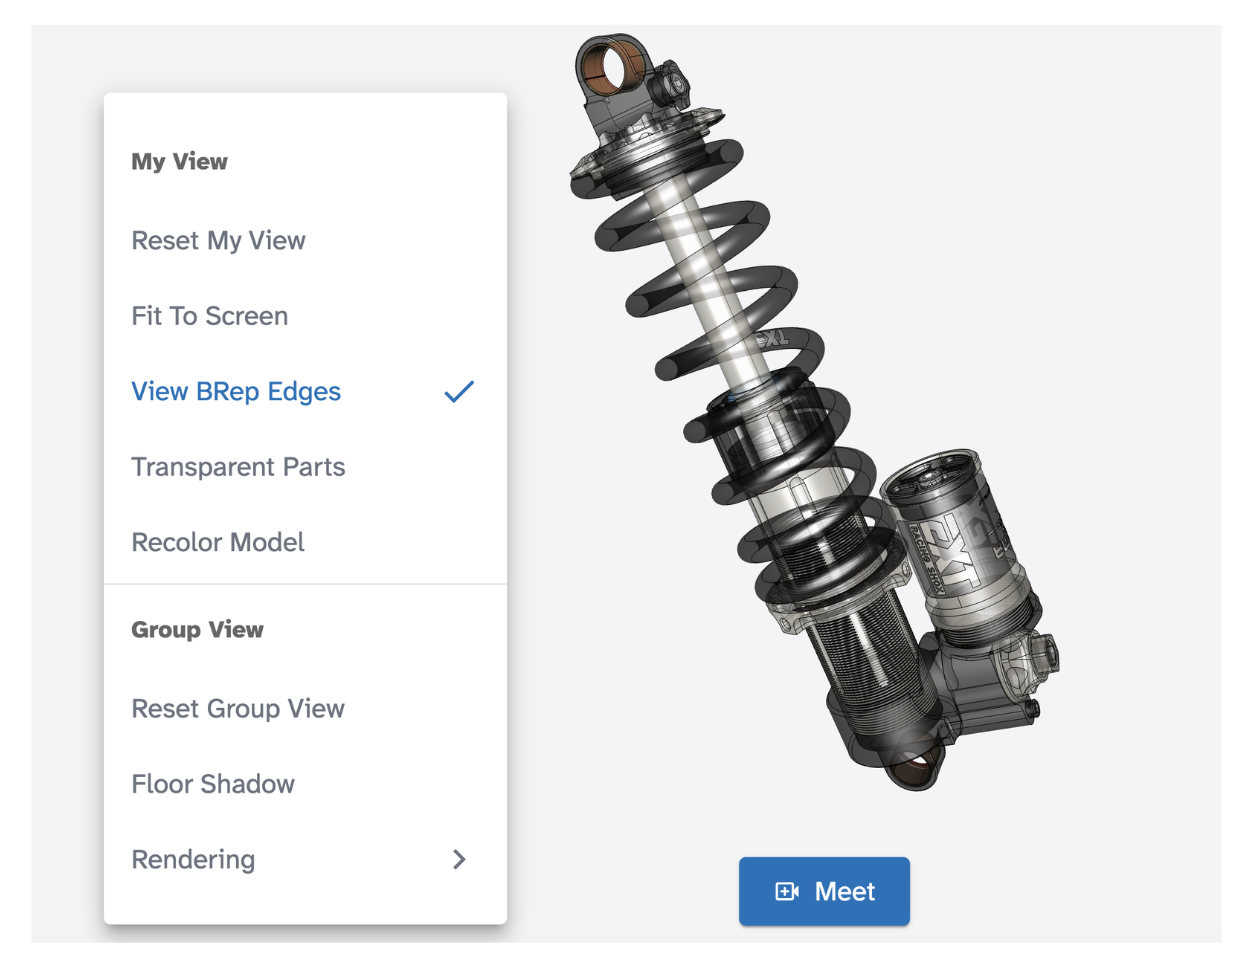
My View
These options only affect your view and are not visible to other collaborators.
- Reset My View: Returns your camera to the default position.
- Fit To Screen: Zooms and repositions the model to fill your canvas.
- View BRep Edges: Toggles display of hard geometry edges. A checkmark indicates it is active.
- Transparent Parts: Makes all parts semi-transparent for internal visibility.
- Recolor Model: Applies a neutral recolor, removing original CAD colors.
Group View
These options affect the shared view for all collaborators in real time.
- Reset Group View: Resets the shared view to the default for everyone.
- Floor Shadow: Toggles a shadow beneath the model on the floor plane.
- Rendering: Opens a submenu to change the rendering environment:
- Default (CAD): Standard CAD rendering style.
- Basic: Simple flat rendering.
- Hidden Line: Wireframe-style showing edges only.
- Empty Room: Model displayed in an empty room environment.
- Office: Model displayed in an office environment.
Tips and edge cases
- Right-clicking directly on a model part opens a different context menu with part-specific options. See Interact with 3D model parts.
- Group View changes are visible to all collaborators immediately. Coordinate with your team before switching rendering environments.